Category Archives: My Crafting

M is for Mod Podge

I’m going to let you in on the ultimate Poor Girls’ Secret… ready… it’s… drum roll, please……

MOD PODGE

{Courtesy of Flickr}

You may laugh. Giggle, even. Mod Podge may be a remnant of your youth. A afternoon activity that involved making hideous ornaments (that, at the time, you thought were beautiful, of course) or kitchen magnets your mother never used.

Not anymore. I own one bottle of Mod Podge, and I’ve already gotten three projects of my own, plus two projects others friends did (sharing is caring… ah, more memories of childhood!). So, five projects. Two frames and three boxes.

Joanne’s offers a great selection of Mod Podges (the next kind I plan on buying is one of the shimmers or sparkles). Once you have your Mod Podge, you may be wondering what you’re going to be ‘Podging on. Well, Michael’s has tons of wooden frames, boxes, etc. They tend to be super-cheap – which is, of course, a plus! Then, all you need is some magazines to clip images from.

My most recent Mod Podge endeavor was a round box I got for about $2. I quickly decided that it would be the perfect place to keep my headbands in. Since this was my third Mod Podge project, I decided to do more of  theme with how I laid out my cuttings. I did darker photos on the lid, and lighter on the bottom. Then on the inside, I, for the most part, tried to go with black and white. Once the Mod Podge had already set, I realized maybe doing the light on the inside – DUH. Whatever, I’m happy with the result!

{Two coats of Mod Podge helped make it more shiny & smooth!}

{Summery, bright colors for the bottom half}

{Monochrome color palette on the inside}

{Inside of lid, har har har}

Other Mod Podging projects I’ve done…

{Wood box from Michael’s}

{“Les Lettres” – it’s a box where I keep all the special notes I’ve received}

{The inside, with a picture of my blogging idol: Emily Schuman}

{My “headband mirror.” It’s next to my closet & I can make sure my headband is well-adjusted before I head out the door!}

So, all you need is some Mod-Podge, a surface, some paint brushes, and time! Then there ya go – a great way to make new accessories for a room or a heartfelt gift for a friend!

Restore us, God Almighty;
make your face shine on us,
that we may be saved.

Psalm 80:7

Leave a comment

Filed under a to z, My Crafting

F is for Flowers & Follow

What a crazy couple of days it has been! It’s been a flurry of projects, tests, trips to Seattle, and congratulating friends on college acceptances. I’m still not sure of where I’ll be attending – however I did get accepted to Central Washington last week! Whoot, whoot!

But back to the point of this post… F is for – drum roll pleaaaase – flowers & follow! Let’s start with the flowers. I don’t believe the connotations it has with spring needs anymore explanation.

{My newest MF&C design}

{Tulle ♥}

I’m really excited about all of the advances in Marie Frances & Company… as in, my goal is to be up & running by the end of the month!

Okay, and then there’s follow. I’m not sure if you guys are aware, but there’s tons of ways outside of my WordPress blog for you guys get in touch with me – which I would love! I want any and all of you to be totally cool with getting in contact with me and giving me feedback, you guys are the ones that matter the most, after all! Soooo, take a quick trip over to my Contact Me page and get in touch with me! I even made cute logo links, so make use of them! :) I look forward to hearing feedback from you lovely ladies (and maybe men? Hehehe)!

Leave a comment

Filed under a to z, Marie Frances & Company

Valentine Round Up

So last week was CRAZY. I had tons of homework, and when I wasn’t working on that I was making a scrapbook for my best friend who turned eighteen this past Friday. So, here is a  bunch of Valentine’s I’m going to throw at you at once. Even though the holiday is past, you can use these ideas to show your love to your special someone year round :) Because really, grand gestures of love really shouldn’t be confined to just one day a year.

“Love Me” flower petals are cut in the shape of a heart, and then secured in the center with a brad.

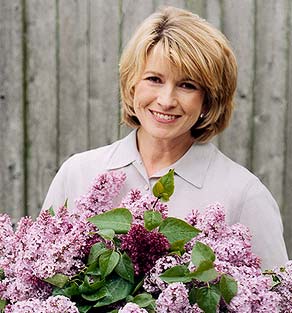
{ Inspired by Martha’s Valentine Flowers }

Heart Fish & Butterfly. For the fish, I cut out two hearts from 4″ x 4″ squares of paper for the body, two hearts from 3″ x 3″ squares of paper for the fin and tail, and a heart from a 1″ x 1″ square of paper for the lips. Then, I put the hearts together, connecting them at the top and gluing them in place. I glued the fin strategically over the top so you couldn’t see where the large hearts met. I glued the tail on the back, and the lips on the front. Might I suggest writing a sweet message on the back such as: You’re the only fish in the sea for me. He he he. So cute, right?! Then, the butterfly. I, again, cut two hearts from 4″ x 4″ squares of paper and one of the 1″ x 1″ hearts.  I also cut out an oval for the body and two skinny rectangles and two punched circles for the antennas. I glued the two hearts bottoms together. Next, I glued the oval their meeting point, glued on the heart head, and then (after gluing the little circles on the top of the skinny rectangles) attached the antennas. And ta-da! You have two, simple, adorable animal Valentine’s cards.

{ Cobweb Valentine from Martha }

Sick of Martha yet?! I hope not!

Bookmark to keep your place in Martha’s Encyclopedia of Sewing and Fabric Crafts!

{ Inspired by Martha’s Ribbon-Punched Valentine }

Last, but not least, the Valentine I made for my mommy :) I used the same back stitching technique from the Ribbon Punched Valentine. I cut a heart, using scalloped scissors, and a slightly smaller heart from the red. My silver stamp pad died (RIP), and so I just wrote Happy Valentine’s Day on in silver Sharpie!

I hope you all had a marvelous Valentine’s Day and tell those you appreciate how much they mean to you not just February 14th, but every single day!

For God so loved the world that he gave his one and only Son, that whoever believes in him shall not perish but have eternal life.

John 3:16

Leave a comment

Filed under How-To's, My Crafting

Five, Six, Seven

Today was such a Monday. Here in Seattle, the weather was positively dreary, and that was very clear in the mood at school. Even my teachers seemed to be absolutely lazy, as we watched movies in half of my classes (not exaggerating). Needless to say, I was very much looking forward to coming home, grabbing one of the homemade chocolate chip cookies my mother made yesterday, a glass of milk, and sit down to the paper craft explosion that is currently engulfing half of the floor in my living room. Of course the mess is well worth it, and I had LOTS of cards (well, three) to make since I slacked over the weekend!

But I digress, how about I show you the cards!

{ Click for larger image }

2/5 – Purple Ribbon Heart. I was thinking earlier today, why do all my cards have to be pink and red?! They don’t! So, this was me thinking outside of the box. Of course, you could do it in any color. I made a  Heart Template for you that is a replica of the one I use for all my heart-shaped crafts as of late.

What I did was cut out the heart (using the outer heart on the template), and then hole punched around the outside, doing an extra hole on one side. I did this so that when I wove the ribbon through, they came out of the same hole so I could tie the lovely bow! Then I stamped the “XO” in silver.

2/6 – Aren’t Shoe Lovely? Card. I had lots of fun shoe stamps, and stamped them on the white paper in red and pink ink. I glued on the pink piece of paper, then cut out my shoes and arranged them around the “Sole Mates!” stamp that I mounted onto red paper.

2/7 – Heart Garland. Another idea borrowed from Martha :) This one is found here. I love the way they link together, it reminds me of those rings that magicians use and they “magically” connect and disconnect. I hope you know what I’m talking about, otherwise I sound crazy… Anyways, I only did three, just so you got an idea. You could use any color combination you want, this one just felt so classically Valentine’s Day to me. The garland isn’t a card in the traditional sense, however, you could write sweet little sayings or a little note along the edges and give it to your special someone!

2 Comments

Filed under Chit Chat, How-To's, My Crafting

Vintage Valentine

Today’s Valentine is my first non-original one! I took the inspiration for this one from Martha’s Antique-Style Valentine. Mine isn’t quite as pretty. However, I do like the dark red paper I used. It’s a little more romantic and sophisticated than your basic bubble gum pink and fire engine red.

{ Click for larger image }

The way it folds up all lovely looks so intricate, but guess what? It’s not :) It only took me one try to master this card (thanks in large part to Martha’s awesome how-to).

2 Comments

Filed under How-To's, My Crafting